Home / Machine safety / Risk assessment checklist
Guide · Machine safety
Machine risk assessment checklist: a practical guide based on AS 4024
What to check, and in what order, when you assess a machine: before it goes into service, after a change, or when nobody can find the last assessment.
A machine risk assessment is a structured look at how a machine could hurt someone and what is done to stop that happening. AS/NZS 4024.1201 sets out the method, and Australian WHS law expects you to manage the risks of the plant you control. This checklist follows that method in plain English. It is a working aid, not a copy of the standard, and it does not replace a competent person looking at your machine.
When you need one
- Before a new or second-hand machine goes into service
- After a modification, a move, a new product or a change in how the machine is used
- After an incident or a near miss
- When guards or interlocks are found damaged or bypassed
- When there is no written assessment on file, or it no longer matches the machine
- At the review interval set in your safety system
Before you start
- The right people: an operator, a maintenance fitter or electrician, a supervisor and someone competent in machine safety. WHS law also requires you to consult the workers affected
- The paperwork: manuals, electrical and pneumatic drawings, and any earlier assessment
- The history: incidents, near misses, breakdowns and known workarounds
- Time on the floor: watch the machine run, change over, get cleaned and get unjammed, not just normal production
- A way to record: a camera and a tape measure, and one line per hazard with a photo
Step 1: Define the machine and its limits
- What the machine is for, and how it could reasonably be misused
- Every mode: automatic, manual, setting, changeover, cleaning, maintenance and fault finding
- Everyone who goes near it: operators, cleaners, fitters, contractors, forklift drivers and visitors
- Where it starts and ends: infeed, outfeed and the machines and conveyors joined to it
- Every energy source: electrical, pneumatic, hydraulic, gravity, springs, stored pressure and heat
- Each stage of its life: installation, commissioning, operation, maintenance and removal
Step 2: Identify the hazards
Walk the machine task by task. For each task, ask what a person could touch, be caught by or be struck by.
- Mechanical: crushing, shearing, cutting, entanglement, drawing-in at nip points, impact and ejected parts
- Unexpected start-up: automatic restart when power returns or a jam clears, and movement from gravity or stored pressure
- Electrical: exposed live parts, damaged cables, poor earthing and isolators that can't be locked off
- Heat, noise and vibration
- Substances: dust, fumes, chemicals and cleaning fluids
- Ergonomics: reach, posture and manual handling at loading and unloading points
- Slips, trips and falls: access platforms, steps and wet floors
- The surroundings: forklifts and traffic, lighting, and any hazardous areas
Step 3: Estimate and evaluate the risk
For each hazard, record four things:
- Severity: how badly could someone be hurt?
- Exposure: how often, and for how long, are people in the danger zone?
- Likelihood: how likely is the hazardous event to happen?
- Avoidance: could the person see it coming and get clear?
Use one risk matrix or scoring method for the whole site, and apply it the same way every time. Then decide whether the risk is acceptable or needs to be reduced. Write down the reasoning, not just the score.
Step 4: Reduce the risk, in order
- Design it out. Remove the hazard, or reduce the force, speed or energy involved.
- Guard it. Fixed guards where people don't need access. Interlocked guards where they do. Light curtains, scanners or two-hand controls where a guard isn't practical.
- Inform and train. Warnings, signs, procedures, training and PPE come last, never first.
Then check the safeguards themselves against the relevant parts of the AS 4024 series:
- Fixed guards need a tool to remove, and guards that are opened regularly are interlocked (AS 4024.1601)
- Openings and reach distances stop fingers, hands and arms reaching the hazard, and gaps can't crush (AS 4024.1801 and 1803)
- Interlocks suit the job and are hard to defeat (AS 4024.1602)
- Light curtains and similar devices are far enough from the hazard for the machine's measured stopping time (AS 4024.2801)
- Emergency stops are within reach wherever people work and stop the hazardous motion (AS 4024.1604)
- Every energy source can be isolated and locked off, and stored energy is released or restrained (AS 4024.1603)
- Restoring power, resetting an emergency stop or closing a guard never restarts the machine by itself
Step 5: Check the safety functions and the control system
Where a control such as an interlock, light curtain or emergency stop does the protecting, it is a safety function, and the circuit behind it has to be reliable enough for the risk.
- Each safety function is listed: what triggers it, what it stops and how quickly
- Each one has a required Performance Level (PLr) that comes from the risk assessment (AS 4024.1503, based on ISO 13849-1)
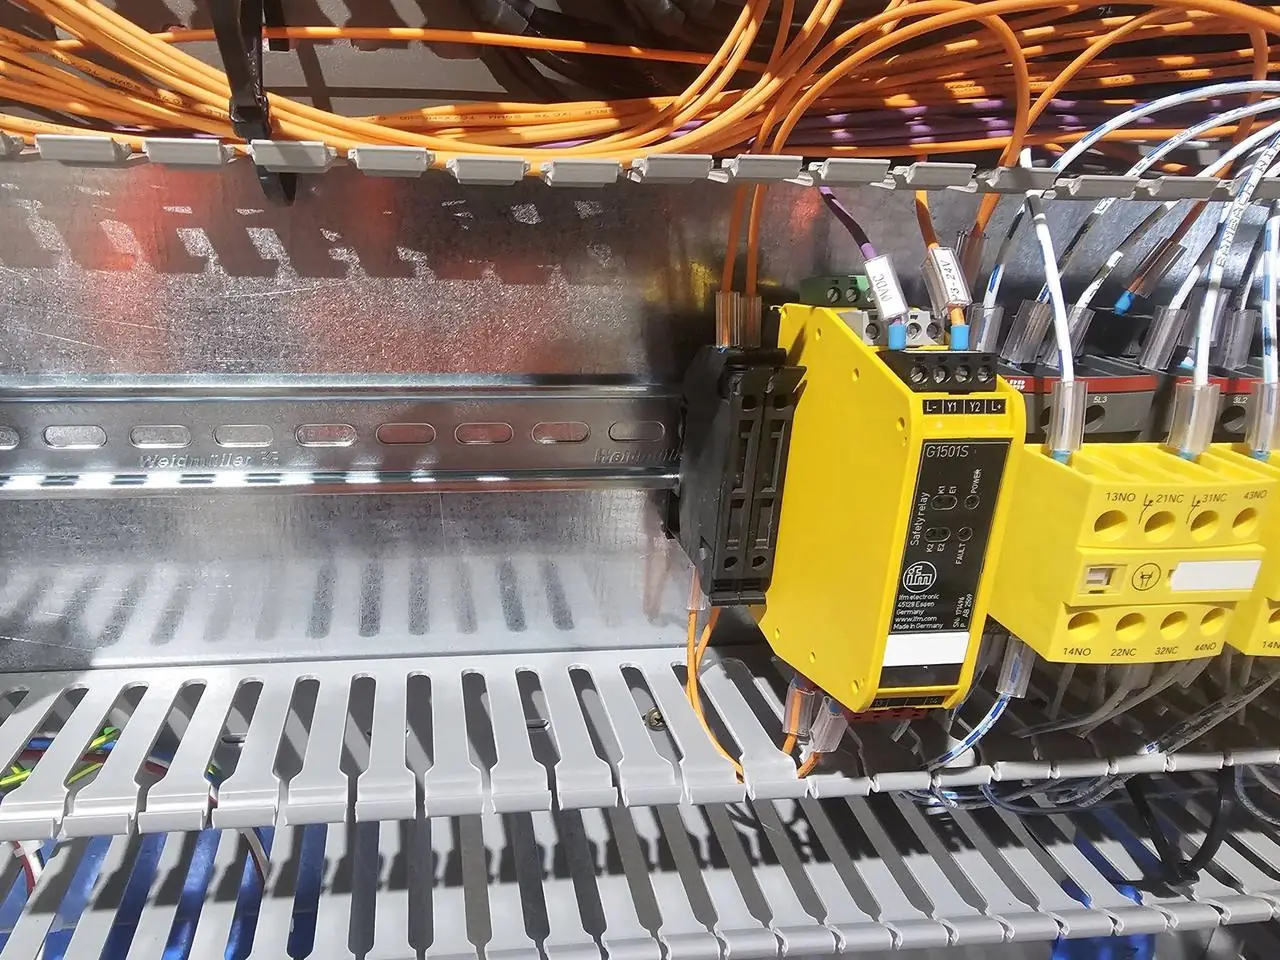
- The circuit uses safety-rated parts from end to end: the sensor or switch, the safety relay or safety controller, and the contactors or drive safe torque off (STO) that stop the motion
- Safety signals don't rely on a standard PLC alone
- Faults are detected: dual channels, monitored contactors and a reset that needs a deliberate action
- The Performance Level achieved is calculated and recorded
Step 6: Validate, document and review
- Every safety function is tested on the running machine and the results are recorded
- Stopping time is measured and safety distances are confirmed
- Remaining risks are listed, with the procedures, signs and training that cover them
- Drawings are updated, and the assessment is signed and dated by the people who did it
- Operators and maintenance staff are shown what has changed
- A review date is set, with a rule to review after any change or incident
What to keep on file
- The risk assessment: hazards, ratings, controls, who took part and the date
- The list of safety functions with required and achieved Performance Levels
- Stopping-time measurements and safety distance calculations
- Validation test records
- Current electrical schematics
- Training records, and inspection records for guards and safety devices
Common mistakes
- Assessing only normal production and missing cleaning, clearing jams and maintenance
- Scoring a risk as low because operators are trained. Training is the weakest control
- Buying a safety relay or light curtain before the assessment has said what is needed
- A generic template with every box ticked and no photos or measurements
- No reassessment after the machine was modified
- Assuming an imported machine complies because it carries a CE mark. Your duties under Australian WHS law still apply
Is it a legal requirement?
The WHS Regulation requires a business that manages or controls plant to manage the risks it creates, with specific requirements for guarding, operator controls and emergency stops. AS 4024 itself is not law, but it is the benchmark a regulator, insurer or auditor will compare your machine against. Our plain-English guide to AS 4024 explains how the standard and the law fit together.
How AMC helps
AMC carries out machine risk assessments to AS 4024, measures stopping times, designs and builds the safety system, installs it, and validates and documents the result. On a pallet wrapper project we carried out the full risk assessment, then added a new safety control panel with a safety controller, light curtains with muting, interlocked access doors and emergency stops, brought the drives under safety control, and finished with stopping-distance validation and full electrical schematics. We work in the Riverina and Australia-wide.
This checklist is general information to help you prepare. It is not a copy of the standard or legal advice, and the requirements for a specific machine depend on its own risk assessment. Written by the AMC Electrical & Automation engineering team in Griffith, NSW. Last checked November 2026.
FAQs
Common questions about machine risk assessments
Is there an official AS 4024 risk assessment template?
No. AS/NZS 4024.1201 sets out the process to follow, but it does not give you a form to fill in. Any template is acceptable if it records the machine's limits, the hazards, the risk estimates, the controls and the people involved, and is used consistently.
Who can carry out a machine risk assessment?
There is no licence for it, but the person leading it must be competent: they need to understand the machine, the hazards and the standard. Operators and maintenance staff should take part, because they know how the machine is really used. Designing and verifying safety control circuits needs someone experienced in that work.
How often should a machine risk assessment be reviewed?
Review it whenever something changes: a modification, a new product or task, an incident, or a control that isn't working as intended. Most sites also set a regular review interval in their safety system.
Do I need a risk assessment for a new machine from a supplier?
Yes. The supplier should give you safety information, but you are responsible for the risks in your workplace: how the machine is installed, connected to other equipment, operated, cleaned and maintained.
What is the difference between a risk assessment and safety validation?
The risk assessment identifies the hazards and decides what controls are needed. Validation comes after the controls are installed, and proves by testing that each safety function works as it was designed to.
Can AMC assess our machines and fix what is found?
Yes. We carry out the risk assessment, design and build the safety system in our Griffith workshop, install guarding and safety devices, and validate and document the finished job. See machine safety.
Next step
Got a plant, machine or board that needs sorting?
Send us the scope, drawings or a few photos. An engineer reads every request and comes back within one business day with next steps and a clear, upfront price.
Project engineer or OEM? Send a P&ID, equipment list or scope for a budget price.